This example demonstrates how data can be sourced from a SQL Server database.
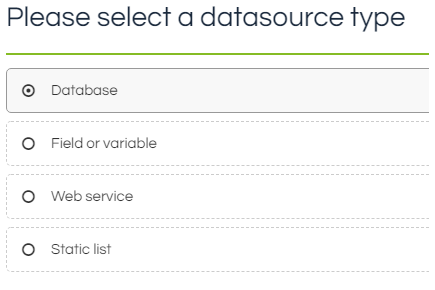
1) Select the Database datasource type:
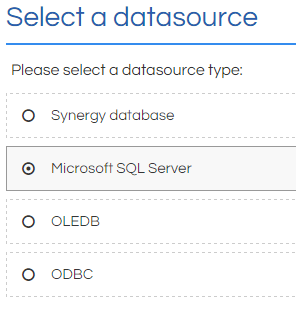
2) Select the type of database you wish to import from. In this example, we will import from a SQL Server database:
Note that if Synergy database is selected, then this skips Steps 3 and 4 and uses the configured default SQL access authentication specified at install.
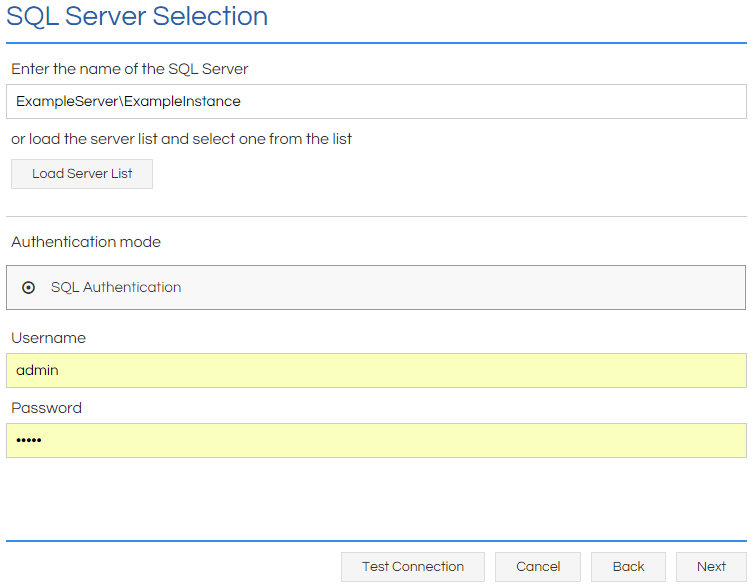
3) Select the server to import from, and enter the server login details. A successful connection must be established before you can progress:
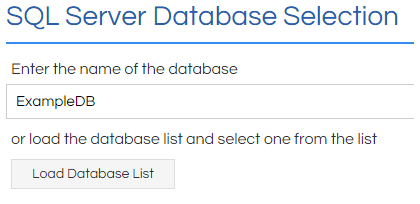
4) Select the database to import from:
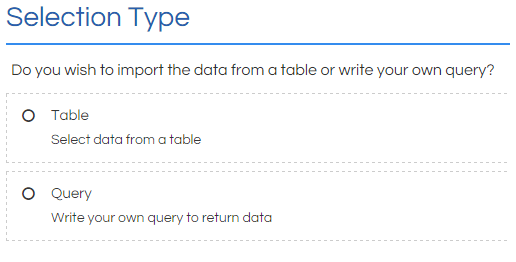
5) Opt to either import the data from a Table (a shortcut for a simply query on a single table), or through a Query:
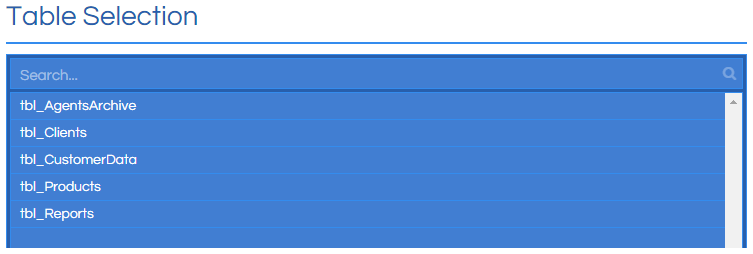
6a) If Table was selected in Step 5, select the SQL Table to import from:
Note that the offered tables will be limited to those that the user specified in Step 3 has access to.
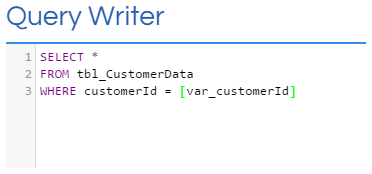
6b) If Query was selected in Step 5, write the query where prompted. This can include using Workflow fields and variables to filter the results:
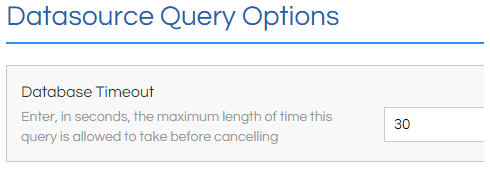
7) Set the timeout threshold for the query. If the query takes longer than this to return, then an error is displayed to the agent:
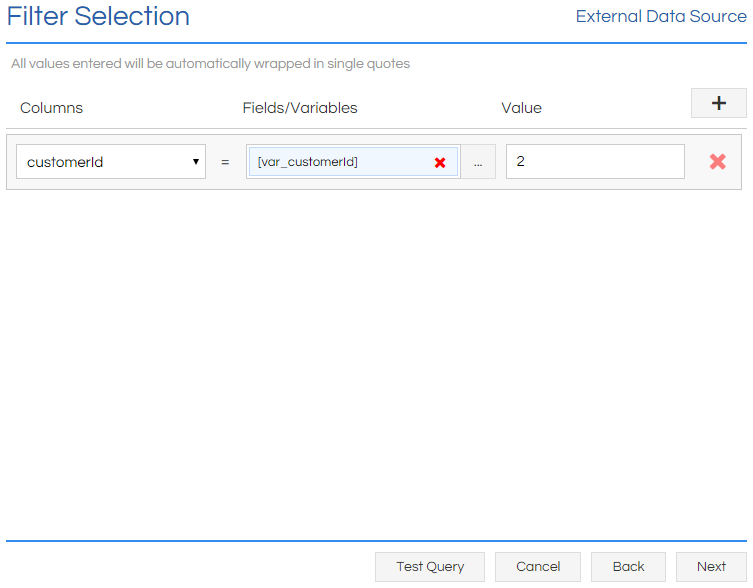
8a) If Table was selected in Step 5, then the returned rows can be filtered by any column's value on this page. Any chosen filters will also need to provide a sample value to ensure the datatypes are compatible:
8b) If Query was selected in Step 5 and any dynamic values were used, sample values should be provided. This allows testing if rows are returned, data types are compatible, and mapping the discovered columns in the following page:
Table Control Only
i) The Table control's reference column needs to be specified; this is a unique identifier that is stored as the Table's value when a row is selected. If Multiple Select is enabled, then multiple rows in the Table can be selected simultaneously, with the Table's value being set as a comma-separated list of the reference column values:
Note that if the reference column doesn't enforce unique values, then selecting a row will also select all other rows with the same reference value.
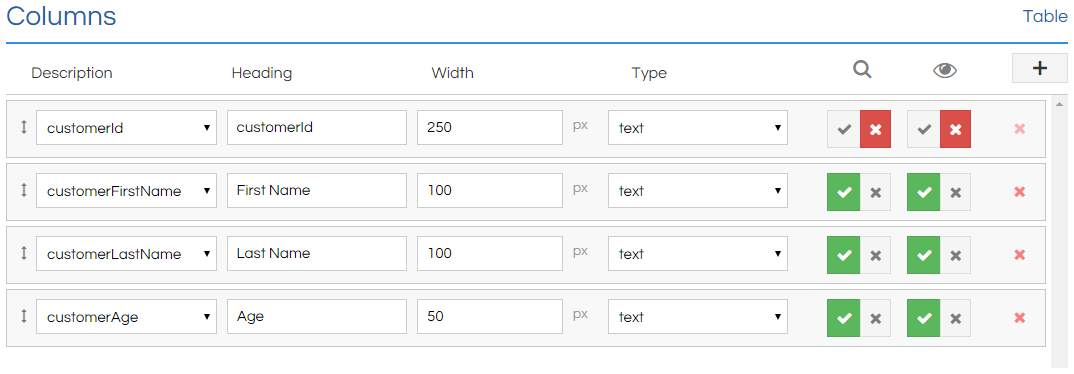
ii) The data to be displayed in the Table control is then defined. The Reference Column is always listed first, but can be hidden by unticking the Visible column for it. Any column in the returned data can be mapped to the Table, and have its names and column width formatted. It's also possible to set whether the column is searchable, or hide columns if their values are needed for mapping but they shouldn't be displayed in the table:
List Box Only
The List Box control's value and display text columns need to be specified; the value of the selected row is stored as the field's value, and the Display Text is what's shown to the agent in the List Box:
Note that if the value column doesn't enforce unique values, then selecting a row will also select all other rows with the same value.
All Controls
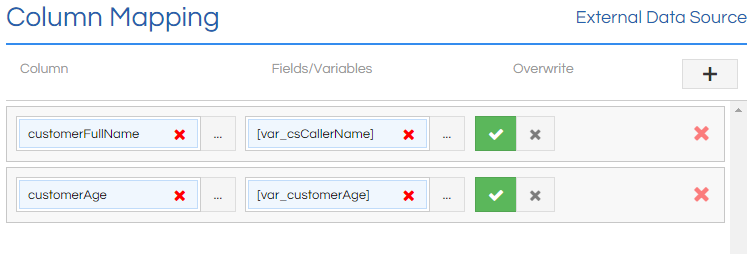
9) Mapping the returned value for each column to a Workflow field or variable is configured on this page, as is whether the value should always overwrite the mapped field/variable, or only if the mapped field/variable is empty:
Note that the List Box can only map the value and display text columns, and will always overwrite.
Note that if multiple rows in a Table or List Box are selected, then no columns will be mapped. Also note that if any of the returned values are null then they won't be mapped, even if overwrite is enabled; to overwrite a field with blank data, an empty string must be used.
10) When the control has been fired in a Workflow, it can be configured to
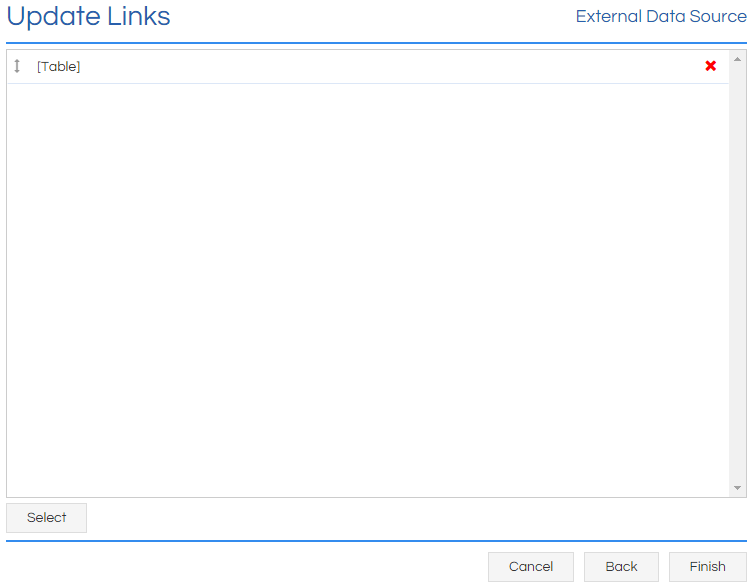
trigger certain other fields when it has completed. In this example, when our External Data Source has completed its query, it will trigger a Table to run its query:
Update links are a deceptively powerful tool, allowing the chaining of multiple controls together. For example; when a row is selected in a Table control, this maps a series of values to Text Boxes and other fields. A second Table then displays a related set of data based upon the selection in the original Table. This could then be taken further, with the second Table being set to trigger a
JavaScript - Button when a row was selected.
11) Click Finish.

