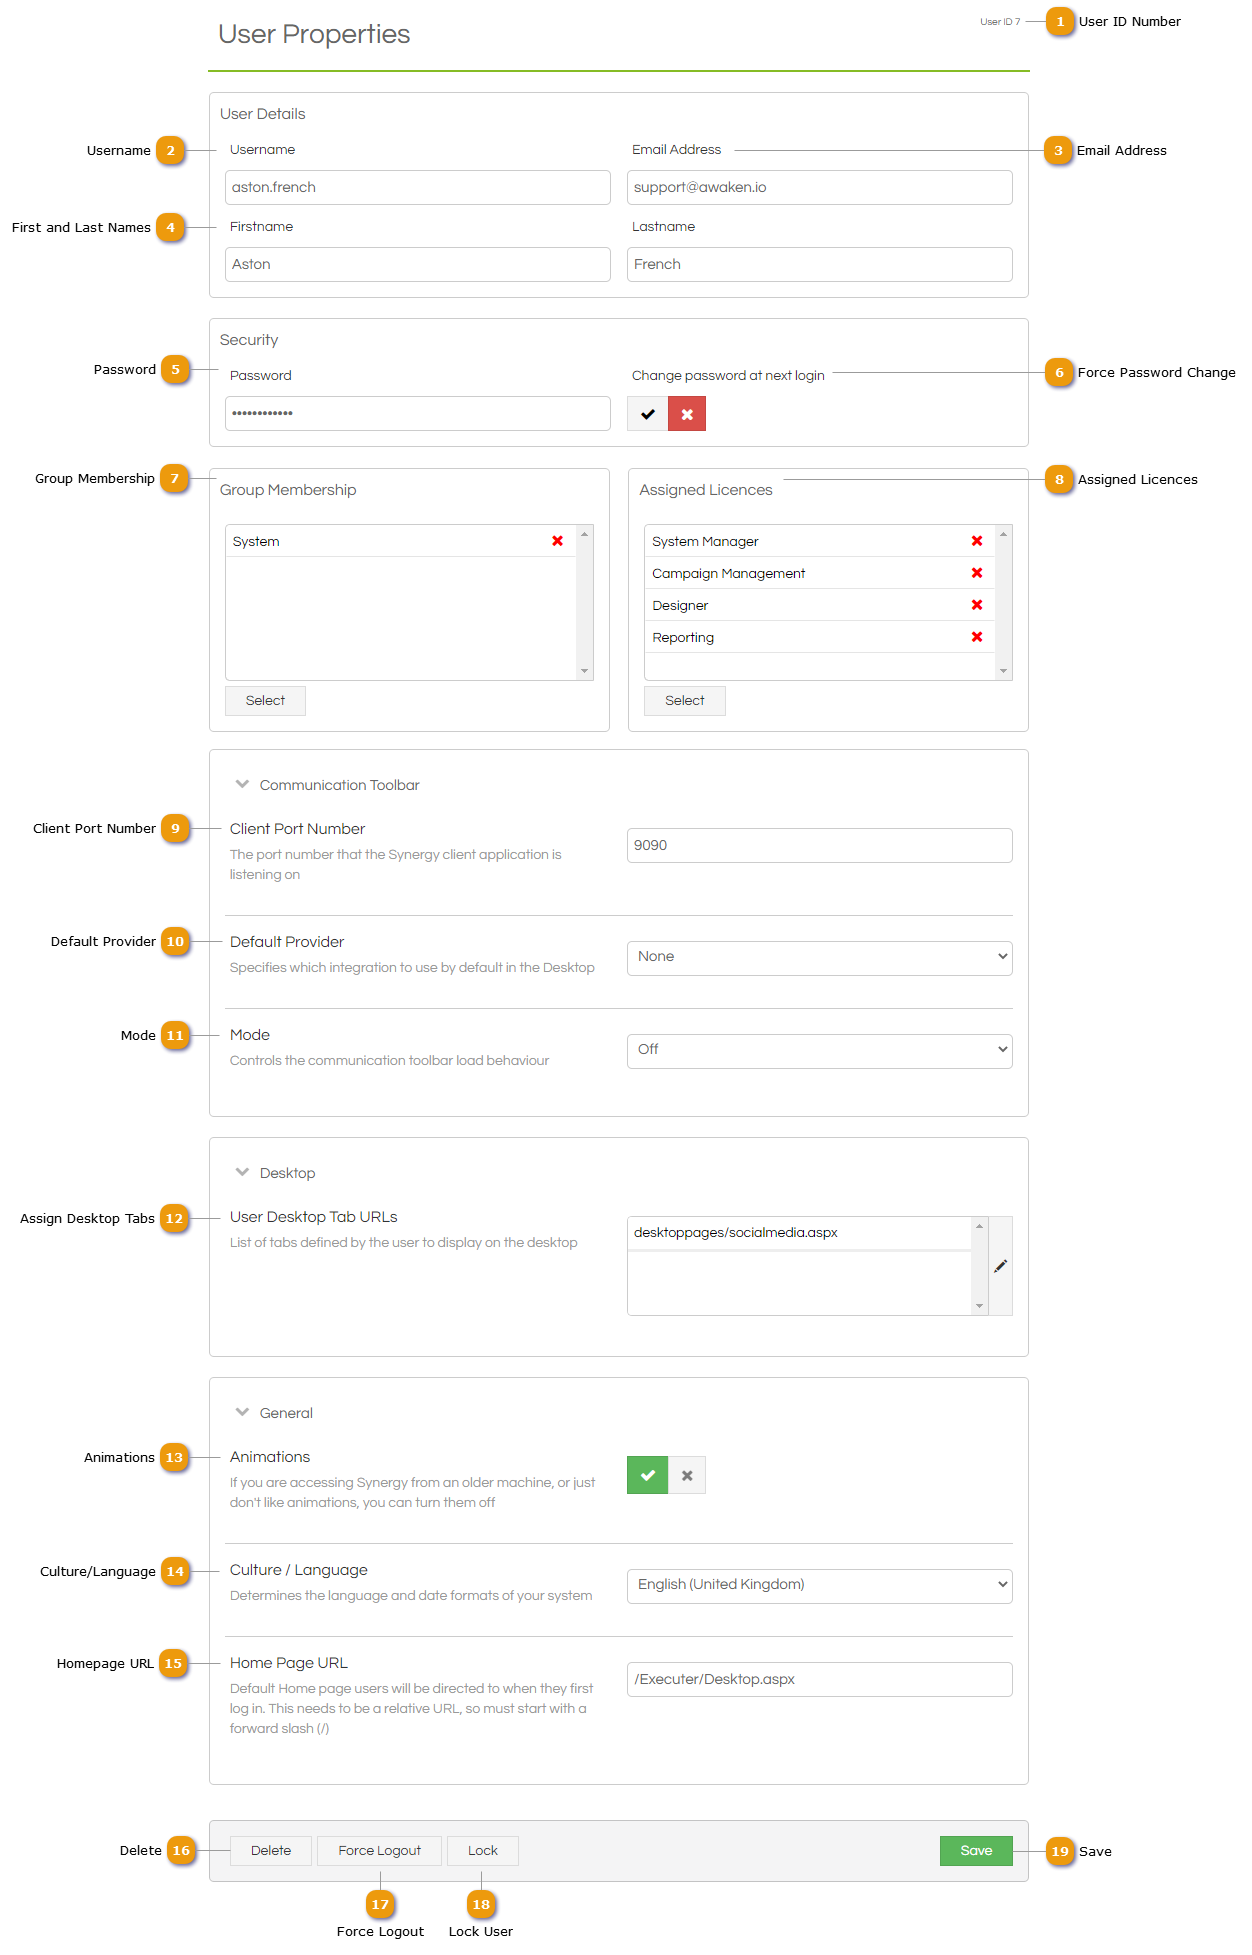
The Users section allows the creation or editing of individual users, assigning them permissions or licences as desired and altering the user account and personalisation settings.
Note that as part of the installation process, the installer will set up an initial administrator user account. See the Installation Guide for further details.
 User ID Number
Displays the unique User ID for the current user.
|
 Username
Set the user's Username.
Note: If using Windows Authentication, then this should match the user's Active Directory username without domain.
|
 Email Address
Optionally set an email address for this user. This is required for the user to make use of the Forgotten Password functionality (if enabled). |
 First and Last Names
Set the user's First and Last names.
|
 Password
Set the user's password (this field will always appear encrypted). If using Windows Authentication, then this is ignored.
Note: If a user's password is altered, they will be immediately logged out from all active sessions and required to log in again with the new password.
|
 Force Password Change
Tick to force the user to change their password when they next log in.
|
 Group Membership
Manage the user's membership of different Groups. |
 Assigned Licences
|
 Client Port Number
Enter the port number for the Scripting client application.
|
 Default Provider
Select the default provider to use in the Agent Desktop (if applicable).
|
 Mode
Set the communication toolbar load behaviour (Off or Server). The user can change this using the Setting button (bottom right corner).
|
 Assign Desktop Tabs
Additional Desktop Tabs for the current user can be specified by entering a website URL (each URL needs to go on a separate line, and start with http:// or https://). Each line will be displayed in a separate Desktop Tab. |
 Animations
Some elements of the screen (for example, the Menu button when clicked) will slide open. If preferred, this can be turned off on a per user basis, so that the screen will snap into position. The user can change this using the Setting button (bottom right corner).
|
 Culture/Language
Set the culture/language for the user. The user can change this using the Setting button (bottom right corner).
|
 Homepage URL
Allows the default homepage to be set. This will automatically take the user to a specific screen in Scripting. The user can change this by using the Set Homepage button. |
 Delete
Click to delete the user. Note that a user cannot be deleted if they have any in-use records, incomplete rescheduled records, or if there are any outstanding transfers to/from the user.
|
 Force Logout
Clicking this will log the selected user out from all connected tabs, browsers, and computers.
|
 Lock User
Clicking this will lock the user, and prevent them from logging in. If the user is currently locked (either manually or automatically), then this can be used to unlock them instead.
|
 Save
Changes will only be applied if the Save button is clicked.
|
|


