The Email control allows emails to be sent from a Workflow either immediately, or at a specified date and time. The email content can be dynamic and based on the data collected in the Workflow, or static.
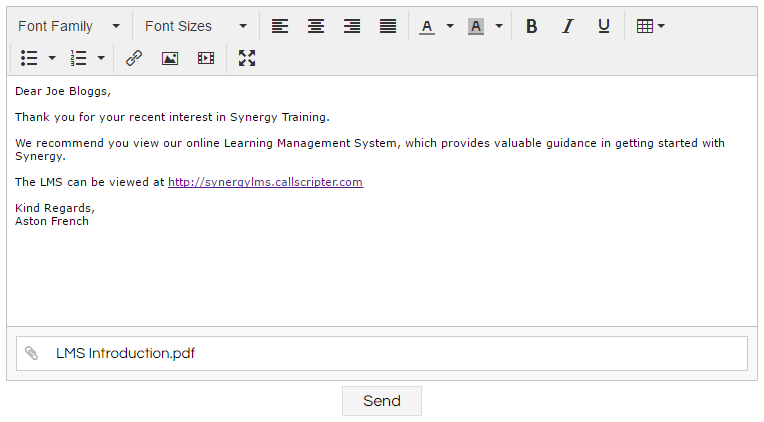
It can be configured so that it is either displayed to the agent as an editable window (as below), a read-only display, or is completely hidden.
This control is part of the Basic control pack, and will always be available.
How To
Add the Email control to the Page that the email should be sent from. The control's options and style can be configured in the
Options and
Styling tabs of the Field Properties, and
Validation and
Formatting can be applied if desired.
The Email control has one unique option available in its Options tab:
|
Option
|
Description
|
|
Show Attachment Path
|
Manages whether or not the agent is able to see any attachment. The filename of the attachment will be shown, but not the path to it.
|
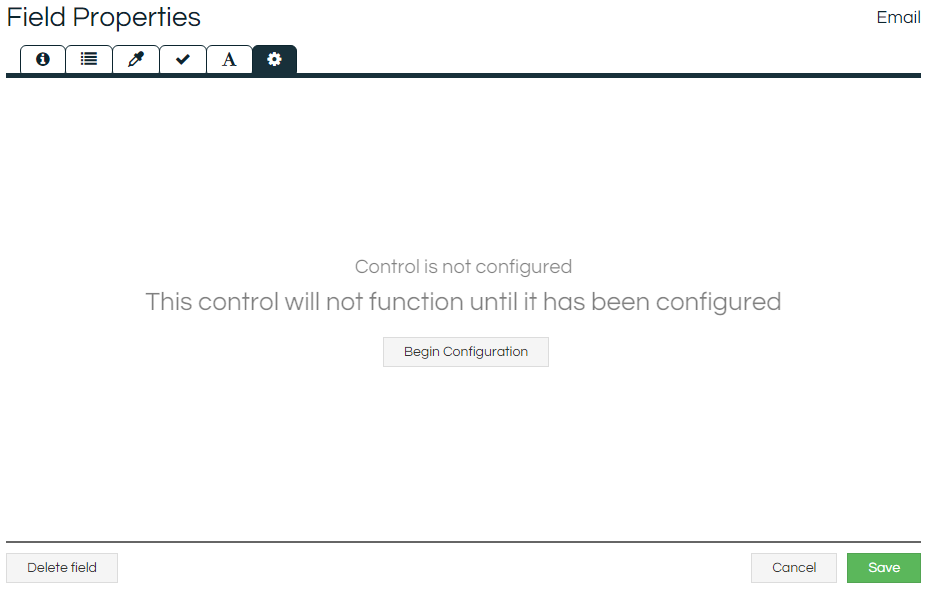
Once the Email control has been configured as desired, clicking the Advanced Options tab will allow the configuration of the actual email content:
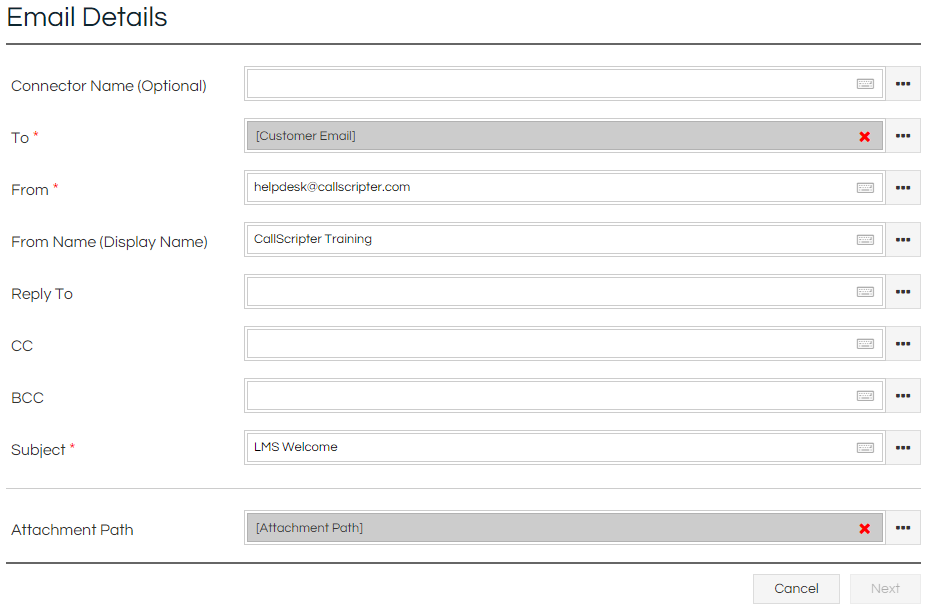
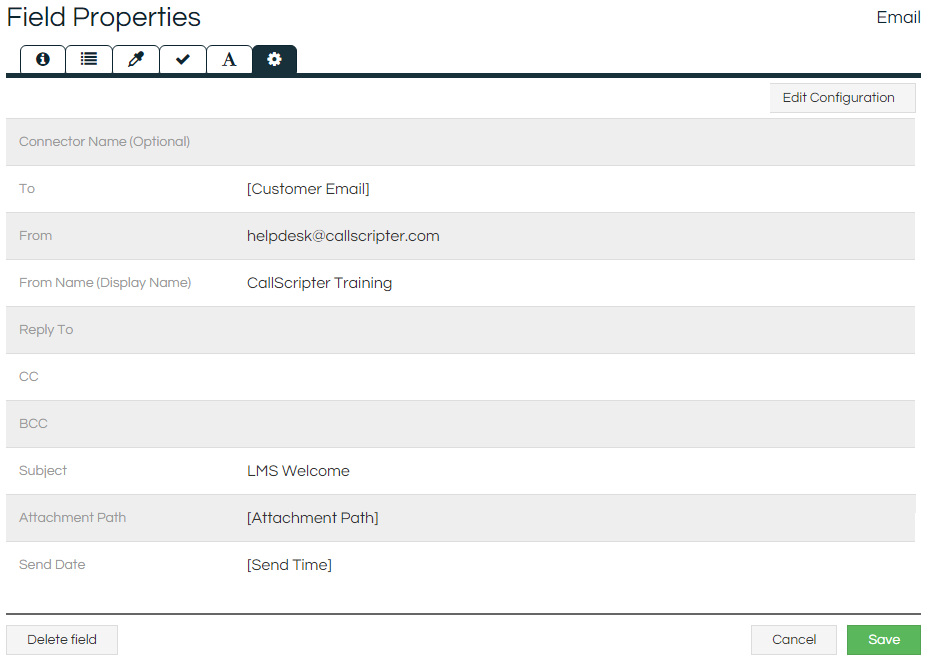
Clicking the Begin Configuration button will open the first step of the Email configuration wizard:
The fields can either be populated with free-text, or they can be linked to Workflow Fields. If linked to a Workflow Field, then they will take the value held in the specified Field at the time the Send button is clicked.
|
Option
|
Description
|
|
Connector Name
|
(Optional) If defined, then the mail server specified in this connector will be used to send the email; if left blank, then the default mail server (specified in Application Settings) will be used.
|
|
To
|
The email address that the email will be sent to.
|
|
From
|
The email address that the email will list as its "From" address.
|
|
From Name
|
(Optional) If defined, then the name that will be displayed as the sender of the email; if left blank, then the default name will be inherited from the mail server.
|
|
Reply To
|
(Optional) If defined, then the address that will be automatically populated if the user chooses to Reply; if left blank, then the From address will be used.
|
|
CC
|
(Optional) Additional email addresses that the email should be sent to.
|
|
BCC
|
(Optional) Additional email addresses that the email should be sent to, that will not be displayed to any recipient of the email.
|
|
Subject
|
The displayed subject of the email.
|
|
Attachment Path
|
(Optional) If attachments need to be included with the email, then the paths to them must be specified here. They can be a file path, URL, FTP link, or reference an attachment from an inbound email (see Notes below). They must be in a location that the Scripting website can access, and must not require any additional actions (such as a login dialogue) to be reached. Multiple attachments can be sent per email, by providing a pipe-delimited list of attachment paths.
|
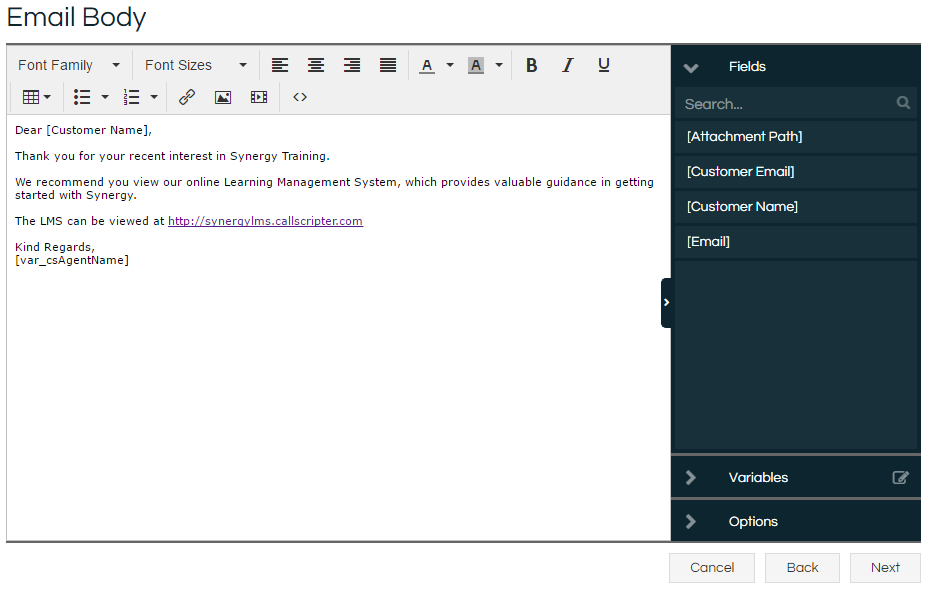
The second page of the wizard then allows you to build the body of the email using a
text editor:
Fields and Variables can be inserted into the text freely, and it can be formatted as desired. The entire email could be static text, or it could be entirely defined by a Field or Variable, or anywhere in between.
The third page of the wizard then allows the configuration of when the email is sent. The default is to send the email as soon as the Send button is clicked, but it can also be configured to send at a specific date and time.
If configuring the email to send at a specific time, then it must be specified via a Field or Variable that contains a date and time. The date and time have
specific formatting requirements and will always be specified relative to the Scripting webserver's system clock, but it's suggested that the "
YYYY-MM-DD hh:mm" format be used.
Once all options have been configured and saved, the Advanced Options tab will then display a summary of the email's details:
Notes
For the Email control to actually work, valid mail connection details must have been configured and saved into either the
Email (Outgoing) settings, or an
Email (Outgoing) connector (and in this case, the connector must be active and the Email control must also be configured to use the configured Connector Name). Additionally, the
Message Processing service must be installed and running.
If using a mail service provider that prevents spoofing (such as Office365), then the From address must match the address specified in the selected connector's settings. To send emails on behalf of a third party, it may be sufficient to simply update the From Name and Reply To details so that it appears to have been sent by that party and will direct replies to them.
If making use of any Workflow Fields or Variables in the body of the email, these need to be set prior to the Page that the Email control is located on. This is because any Fields or Variables used in the body of the email are evaluated and replaced with their corresponding value when the Page is loaded, as continuing to update it after page load could overwrite any changes made to the text by an agent.
It is possible to forward an attachment from an inbound email for users comfortable with JavaScript. Use the
Script.Data.GetPostDataItem("attachmentList") Helper Function to get the JSON array list of attachments, and then extract the
Url value for the attachment(s) you wish to forward. These can then be passed to the Email control by putting the attachment link(s) in a Workflow field or Variable that is assigned as the Attachment Path.
When clicking the Send button, a "Sent" message appears for the agent. This actually means that the message has been moved into the message queue, and will be processed when the Message Processing Service next polls the queue (according to the chosen send time). Any specified attachments need to exist at this time, or an error will be displayed instead.
When the Email has been moved into the message queue successfully, the Email control will take on a value of "Sent", which can be used to control conditional behaviour based on the email having been triggered.
As with other button-type controls, it is possible to require a Page pass
validation before the button will activate. This prevents the email from being sent before all requisite details have been collected.
As with other button-type controls, upon activation the button will then be disabled until the action has completed.
As with other button-type controls, it is possible to trigger this by JavaScript or
Update Links. Please see the
.click() article for more information and an example regarding using JavaScript.

