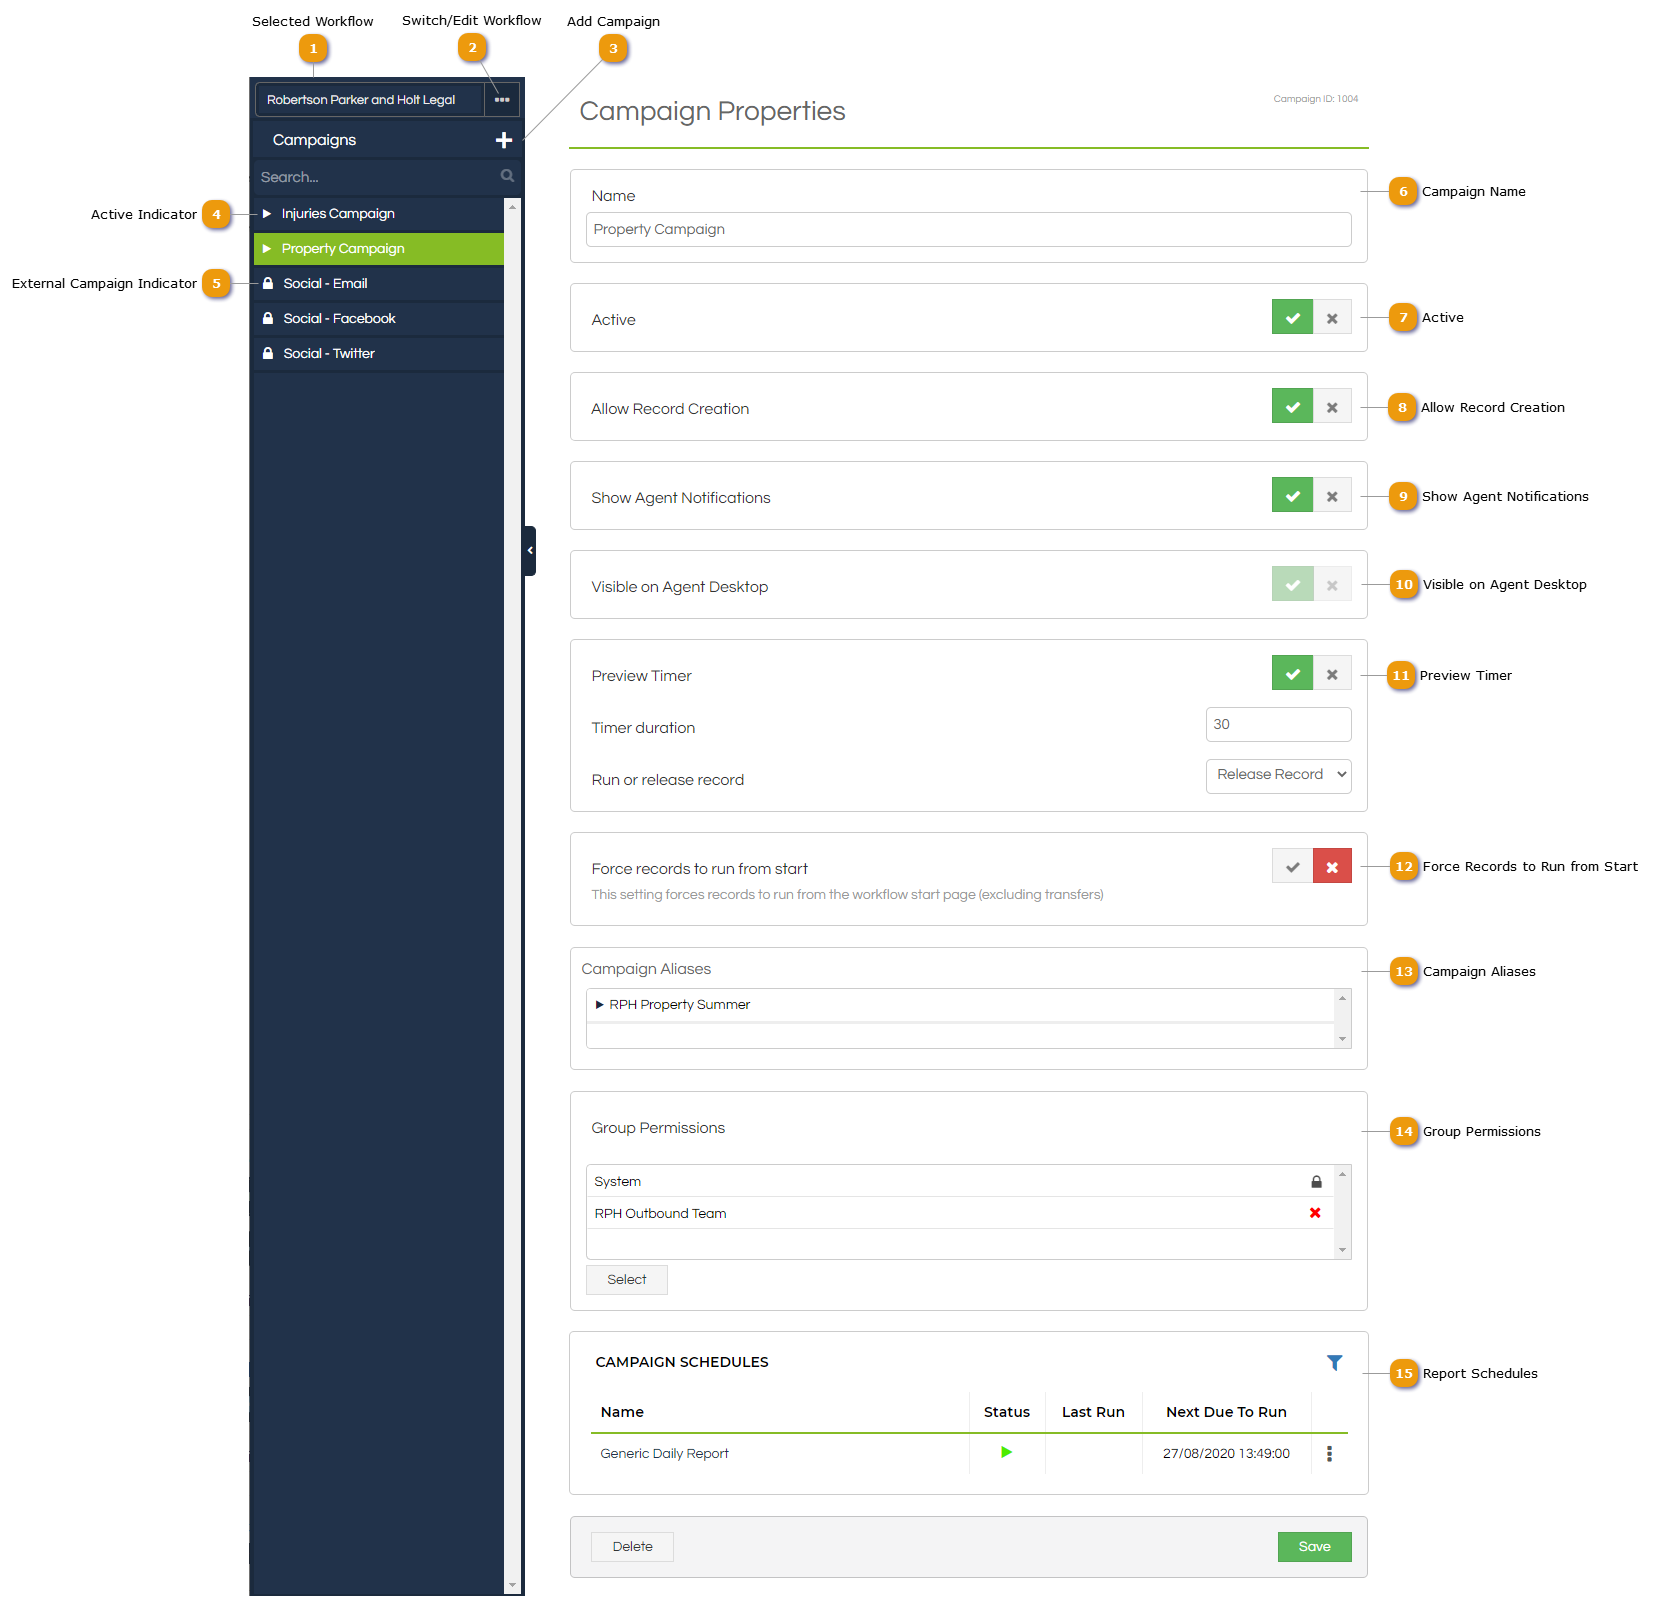
Campaigns
Campaign names are displayed on the Desktop, rather than Workflow names.
Campaigns only need to be created in this module if:
-
The Workflow is not being opened by a dialler or external mechanism, and so needs to be opened manually (for example, by an agent clicking on the campaign/Workflow link in the Desktop),
-
You would like to see the Workflow/campaign appear as a link in the Desktop (perhaps for manual testing purposes),
-
If a campaign alias (for example, to link a DDI to a Workflow) is being created (usually for inbound campaigns).
For dialler users, creating a campaign is only required if the above points are required. In this situation the Campaign name is created in the dialler, and linked with the Workflow using the Workflow Properties External Links feature.

|
This icon is displayed next to any External Campaign defined through an Integration and the External Links. The Campaign's configuration is viewable, but only certain options are editable for external campaigns.
|
 Controls whether or not the Campaign allows pop attempts that don't specify a reference, and (if the Visible on Agent Desktop setting is enabled) determines whether the agent is able to create a new record from the Campaign's entry on the Desktop.
|
 Determines whether agents will receive notifications in the outstanding tasks section of the Desktop for this campaign. This option is only relevant if Outstanding Task Notifications are enabled within the Desktop Application Settings.
|
 Determines whether the campaign is visible on the Agent Desktop or not.
This is only offered for External Link campaigns, and internal campaigns will always be displayed on the Desktop if active.
|
 Any Campaign Aliases linked to a Workflow will be displayed here.
|
 Groups with access to the Campaign can be defined here. A group may have access to multiple campaigns, and multiple groups may have access to a campaign. The System group will always have permission to all campaigns. Members of assigned groups will be able to interact with the Workflow in the Desktop Campaign List via the configured Campaign, as well as receive transfers or reschedules for the Campaign.
|
 If the current user has a Reporting licence assigned, then any configured and linked Report Schedules will be displayed in this list. This list can be filtered by the reports' current status by clicking the button at the top-right corner, the schedule can be directly run or paused/resumed by clicking the triple-stacked dots at the right of the entry, or the schedule can be managed by clicking on its name to go to it in the Reporting Scheduler module.
|


