Integration - Genesys Cloud
Integrating Scripting with Genesys Cloud is a straightforward process, and allows Workflows to be popped within Scripting when an interaction is delivered to the user in Genesys Cloud. Scripting can be integrated with Genesys Cloud in one of three ways: embedded via a Premium Application from the Genesys AppFoundry, embedded via the Client Application from the Genesys AppFoundry (either configured individually or by a partner), or standalone as an entirely external window outside of the Genesys Cloud frame.
Once integrated, any user with access to the relevant licence part(s) in Scripting will receive a Campaign pop if they are on the Scripting Desktop when a Genesys Cloud interaction is accepted by their user in Genesys Cloud.
If you wish to make use of the Genesys Cloud integration, please contact your Scripting vendor.
Broadly, integrating Scripting with Genesys Cloud has five steps:
Note that the three different methods of using Scripting with Genesys Cloud (embedded via Premium Application, embedded via Client Application, or standalone in an external frame) share much of the setup process, but diverge at some points - be sure to select the appropriate options for your scenario during the process.
Scripting's licensing of Genesys Cloud integration features can be provided in either a system-wide or named user format. To decide which is best for your usage, please contact your Scripting vendor.
For all: Ensure that your Scripting licence includes the Integration - Genesys Cloud licence part. If it is of the Named type, then ensure it is assigned to all appropriate users.
For Client Application or Standalone: Ensure that your Scripting licence also includes the Integration - Genesys Cloud - Partner licence part. If it is of the Named type, then ensure it is assigned to all appropriate users.
For Standalone: If making use of the Integration - Genesys Cloud - Softphone licence part, and if it is of the Named type, then ensure it is assigned to all appropriate users.
For Premium Application or Client Application: Ensure that the directions in the operating Scripting within an iframe article have been followed. If this isn't done, then Scripting won't be accessible from within the Genesys Cloud environment's frame.
Follow the appropriate configuration article depending on the integration type that is being targeted:
Note: If your Scripting system has the Genesys Cloud integration as an assignable Named licence part rather than Per System, the current user will need to be assigned the licence to see this section.
Once the relevant process has been followed, the Client ID obtained from Genesys Cloud needs to be entered in to the Integration - Genesys Cloud section of the Application Settings section, and the appropriate Genesys Cloud region selected (matching the domain of the Genesys Cloud website that the configuration process was performed in):

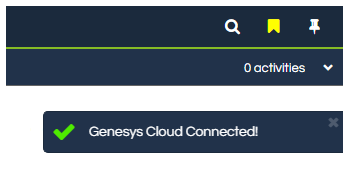
To confirm that the integration is working correctly, simply log in to Scripting as a user with access to the relevant Integration - Genesys Cloud licence part(s) and confirm whether the successful connection Toast is displayed when loading the Desktop:

Having configured the core integration, the next step is to configure the Campaigns that will be used to pop the correct Workflow within Scripting when an interaction is received in Genesys Cloud.
There are three basic ways to do this, which can be used in isolation or combination:
-
Make use of the Integration - Genesys Cloud plugin to retrieve Campaigns and wrap-up codes directly from Genesys Cloud, discussed in Step 4a,
-
Use the Integration - Generic plugin to manually define the Campaigns that will be used from Genesys Cloud, discussed in Step 4b,
-
Create internal Campaigns within Scripting, and use the same detail discovered via the method for Integration - Generic, discussed in Step 4b, to create an internal Campaign rather than an External Link Campaign. Do note, however, that if using this method then pop data will only be accessible via the Script.Data JavaScript layer and not via Link Columns.
Note: If your Scripting system has the Genesys Cloud integration as an assignable Named licence part rather than Per System, the current user will need to be assigned the licence to see this section.
If it's desired to make use of the Genesys Cloud - Plugin to retrieve campaigns and wrap-up codes directly from Genesys Cloud, then a separate and additional OAuth client needs to be created within Genesys Cloud and then linked within Scripting.
Within the "OAuth" section of the Genesys Cloud admin settings, click the Add Client button:

Once inside the client creation screen, the following configuration must be made:
App Name: enter a name that is unique among the existing OAuth clients, and ideally relates to the name of the created Premium or Client Application (for clarity) - e.g. Awaken Scripting - Documentation - Plugin.
Token Duration: leave this as the default of 86400.
Grant Type: set this to Client Credentials.
Roles: assign a role that has (at minimum) the specific permissions listed below, and assign it to the appropriate division(s).
-
Wrap-up codes: Routing > Wrap-up Code > View and Routing > Queue > View
-
Inbound campaigns: Telephony > Plugin > All
-
Outbound campaigns: Outbound > Campaign > View
-
Email campaigns: Routing > Email > Manage
-
Link Column data: Outbound > Contact List > View
Once the new client has been saved, the window should look similar to the below image. Make note of the Client ID and Client Secret listed in the final panel on the page:

Once this OAuth client has been created, the Client ID and Client Secret need to be entered in to the Integration - Genesys Cloud section of the Plugins section, and activated:

Once the plugin is activated, the External Links panel will offer the ability to select the inbound, outbound, or email stream to be linked to each Workflow. In addition, Outcome - Button and Outcome - List controls will offer the ability to utilise any wrap-up codes defined on the system.
The Campaign identifier to be used when creating the Campaign (e.g. via External Links for Integration - Generic) will vary between the different interaction types in Genesys Cloud - but must be used exactly as they appear in Genesys Cloud to ensure a successful pop. Some examples are shown below, but if the identifier is not known for a particular interaction type it can be determined directly by enabling the Show Campaign Warning setting and then trying to pop that type of interaction as this will then display the failed pop identifier in a Toast.
To best-support accessing data provided with the pop in a Workflow, it's recommended that the Integration - Generic plugin be enabled and used to create the Campaigns. If not using Integration - Generic, then pop data will only be accessible via the Script.Data JavaScript layer.
For inbound telephony, use the inbound phone number as specified within the "Call Routing" section of the Genesys Cloud admin settings.

For outbound telephony, use the Genesys Cloud campaign's GUID as seen at the end of the URL when on the campaign's configuration page within the "Campaign Management" section of the Genesys Cloud admin settings.

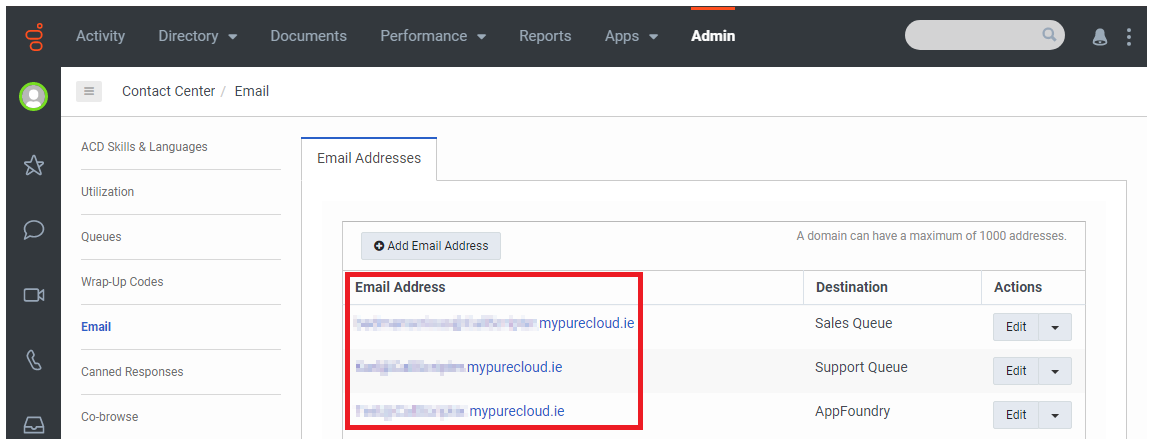
For inbound emails, use the address of the receiving mailbox as specified within the "Email" section of the Genesys Cloud admin settings.

Please see the Workflow Design for Genesys Cloud article.
For systems being configured for use in the standalone in an external frame, an optional feature is the inclusion of the Genesys Cloud softphone into the Scripting Desktop. This simply embeds the Genesys Cloud-offered softphone within the Scripting frame, and Genesys documentation should be consulted to review functionality and usage of the softphone itself.
To make use of the embedded softphone, users will have to have access to the Integration - Genesys Cloud - Softphone licence part. When on the Desktop, the highlighted button on the toolbar can be clicked to toggle the visibility of the softphone's panel:

As Genesys Cloud itself doesn't support Internet Explorer 11, it is not possible to use the Genesys Cloud integration except in Google Chrome.
If improper configuration is made between Genesys Cloud and Scripting, it is possible that attempting to log into Scripting will lead to access problems. If this is encountered, then forcing navigation to a URL other than the Desktop can allow access to the required admin sections (if licenced) to resolve the improper configuration. For instance, adding /systemmanager/configmain.aspx?g=integration%20-%20genesys%20cloud to the end of the Scripting core URL.
Due to the nature of the event-based popping within Scripting for this integration, care should be taken not to have multiple Desktop windows open for the same user within Scripting, as any and all instances of that user's Desktop will simultaneously pop duplicates of the same interaction. This can lead to indeterminate data states, and must be avoided in all cases.
As completing an interaction in Genesys Cloud is separate from completing a Workflow run in Scripting, care should be taken to ensure that the Workflow run in Scripting has been completed and closed prior to accepting a new interaction from Genesys Cloud. If this isn't done, then it could lead to multiple in-progress activities existing for the agent and therefore incomplete processes and a build-up of abandoned records.
As agents will commonly need to be assigned the employee, Communicate - User, Outbound Agent, and PureCloud User roles within Genesys Cloud, it's expected that users will typically need access to a PureCloud 3 licence within Genesys Cloud.
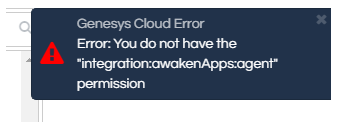
If a Toast warning is seen when loading the Desktop regarding the integration:awakenApp:agent permission not being available, then this either means:
-
You're using the Premium Application route, but don't have the part available to your user in Genesys Cloud.
-
You're using the Client Application or External Frame route, but haven't got the Integration - Genesys Cloud - Partner licence part available to your user in Scripting.
